In this article, we will be sharing the Chicken Breast recipe; cooking chicken breast can be tricky—too often, it turns out dry, tough, and stringy. But with the right techniques and tools, you can achieve tender, flavorful, and juicy chicken every time.
Many home cooks struggle with overcooking, using the wrong pan, or skipping key steps that ensure perfectly cooked chicken. This guide will walk you through everything you need to know, from choosing the right chicken breast to searing it to perfection and finishing it with a delicious pan sauce.
Follow this step-by-step method, and you’ll never have to deal with dry chicken breast again! Let’s get started. 🚀🔥
How to make the Perfectly Juicy Chicken Breast | Step-by-Step Guide
Step 1: Choosing the Right Chicken Breast 🐔
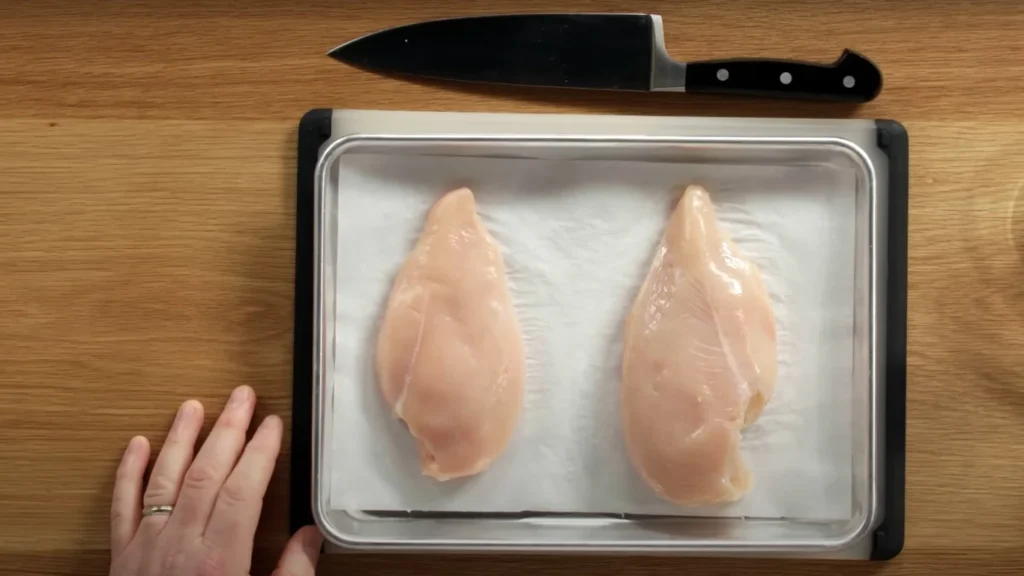
Right now, I have two chicken breasts in front of me.
- ✔️ One is smaller
- ✔️ One is larger
Why Size Matters in Chicken Breast Recipe
I always go for the smaller ones because:
- ✔️ They’re more tender – The fibers in smaller chicken breasts are less dense, making them softer and easier to chew.
- ✔️ They have a better texture – They cook more evenly, so you don’t get that weird rubbery texture in some spots.
- ✔️ They cook faster – Which means less risk of drying out.
A larger chicken breast might look impressive, but it’s harder to cook properly. The edges dry out while you’re waiting for the thick center to finish cooking. That’s why choosing the right size is step one in making the perfect chicken breast.
Fresh vs. Frozen – Does It Matter?
A lot of people ask whether fresh or frozen chicken is better. Here’s the truth:
- ✔️ Fresh chicken breast is always better – It retains more moisture, so it stays juicier when cooked.
- ✔️ Frozen chicken breast is fine, but… – You have to thaw it properly to avoid ruining the texture.
🔹 The Right Way to Thaw Chicken:
- ✅ Always thaw in the fridge overnight. This keeps the chicken at a safe temperature and lets it reabsorb moisture as it thaws.
- ❌ Never thaw in warm water – This makes the chicken mushy because the outer layer starts to cook while the inside is still frozen.
What About Pre-Marinated Chicken?
Some stores sell pre-marinated chicken breasts, but I avoid them. Why?
- They’re usually pumped with brine, which makes them soggy instead of juicy.
- The added flavors are often artificial and can overpower the dish.
Tip
👉 Always go for small, fresh chicken breasts for the best results!
Step 2: Preparing the Chicken 🔪
Now, I have one chicken breast that’s good to go, but the larger one needs a little work before it hits the pan.
How to Slice It Properly
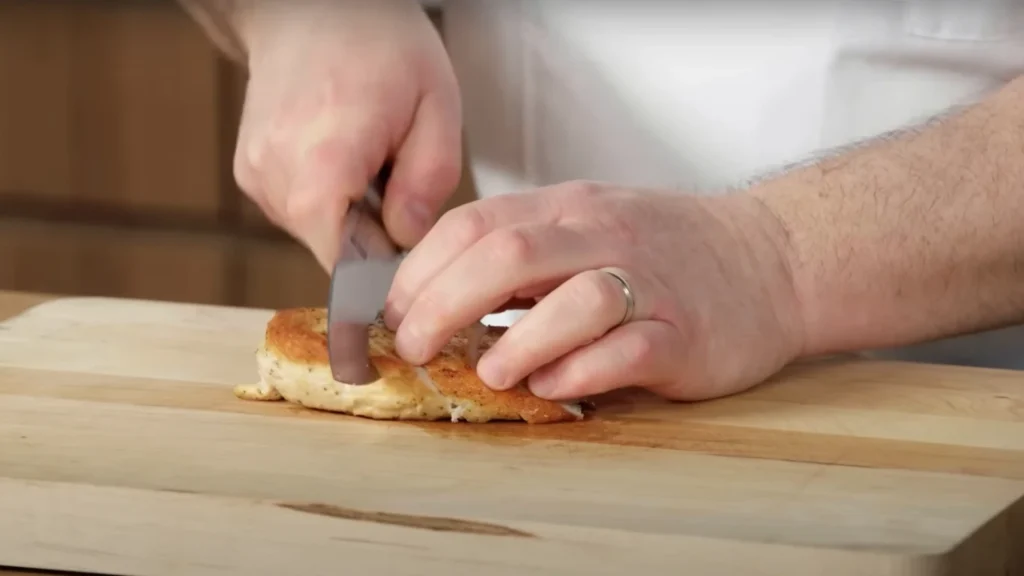
When cooking chicken breast, thickness is everything. If it’s too thick, it cooks unevenly—you’ll end up with dry edges while the center is still raw. That’s why I slice mine in half before cooking.
- ✔️ I take the larger breast, place my flat hand on top, and slice it right down the center using a sharp chef’s knife.
- ✔️ This gives me two thinner, evenly sized pieces, which means:
- ✔️ Even cooking – No more raw centers and overcooked edges.
- ✔️ Better texture – The meat stays tender and juicy.
- ✔️ No dry edges – Since it cooks at the same speed, nothing gets dried out.
Chef’s Tip:
Always use a sharp knife! A dull knife tears the meat instead of slicing it, which ruins the texture and makes it harder to cook evenly.
Should You Pound It?
Some people like to pound their chicken with a meat mallet to make it thinner. But here’s why I don’t do that:
- ❌ It makes the chicken too thin – If the chicken is too flat, it cooks way too fast and ends up dry and rubbery.
- ❌ It won’t brown properly – A thicker piece gets a better sear, which means more flavor.
💡 When Should You Pound Chicken?
There are some cases where pounding chicken makes sense—for example, if you’re making chicken schnitzel or chicken parmesan, where you need a very thin cutlet. But for pan-searing, keeping it slightly thicker is the key to getting that golden-brown crust while keeping the inside juicy.
Trimming the Chicken (Optional)
Before moving to the next step, I quickly check my chicken for any:
- ✔️ Fatty bits – I trim off any large chunks of fat since they won’t render properly.
- ✔️ Tendons – If there’s a thick, white tendon running through the meat, I remove it with my knife.
This extra minute of prep ensures that every bite is perfect—no chewy bits, no weird textures.
Now, my chicken is the perfect size and shape, and I’m ready to season it!
Step 3: Seasoning – Keep It Simple! 🧂
When it comes to seasoning, less is more. Some people think you need a bunch of fancy spices to make chicken taste good, but the truth is:
- ✔️ Great technique = great flavor
- ✔️ Simple seasoning lets the chicken shine
That’s why I keep it basic and effective:
- ✔️ Kosher salt – Helps the chicken retain moisture and enhances its natural flavor.
- ✔️ Freshly cracked black pepper – Adds a little heat and depth without overpowering the dish.
Why Not Use More Spices?
I know a lot of people love spice rubs, but here’s the problem when you’re sautéing chicken:
- ❌ Spice rubs burn – When you cook at a high heat, spices like paprika, garlic powder, or cayenne can burn before the chicken is cooked.
- ❌ Burnt spices don’t taste good – They turn bitter and overpowering, which ruins the dish.
If I were grilling or roasting the chicken, a spice rub would be fine. But for pan-searing, salt and pepper are all you need.
How to Season Properly
A lot of people season wrong—they throw salt on haphazardly and wonder why their food tastes bland in some spots and overpowering in others. Here’s how to do it right:
✔️ Step 1: Pat the Chicken Dry
Before seasoning, always pat the chicken completely dry with a paper towel. Why?
- Moisture prevents browning. If the surface of the chicken is wet, it steams instead of searing, and you won’t get that golden crust.
- Dry chicken = crispier and more flavorful.
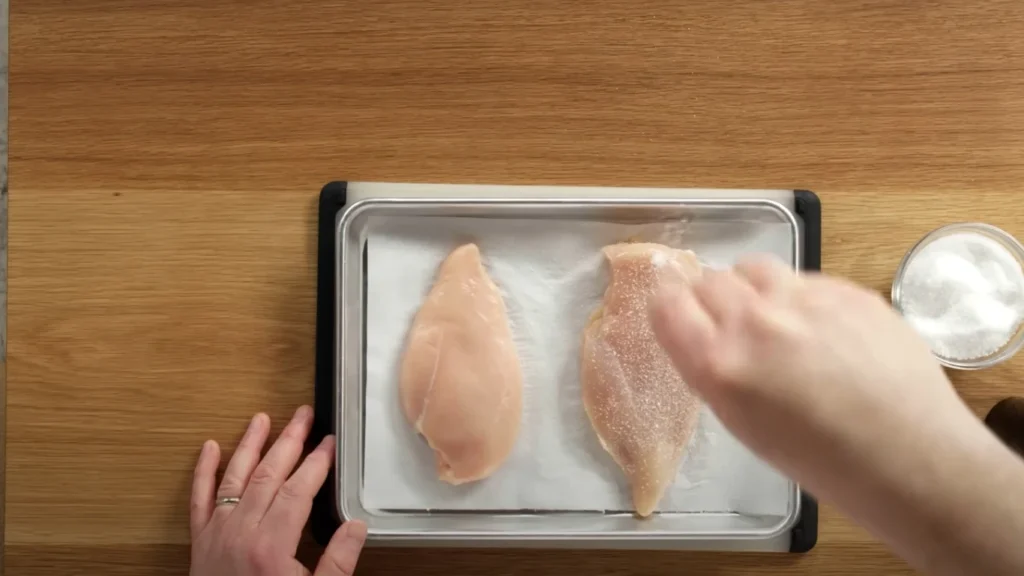
✔️ Step 2: Season from High Above
- Hold the salt and pepper high above the chicken while seasoning.
- This helps distribute the seasoning evenly instead of in clumps.
✔️ Step 3: Flip and Season the Other Side
- Don’t forget the bottom! Seasoning one side only is a rookie mistake.
- Flip the chicken and season both sides equally.
Bonus Tip : Let It Rest for a Minute
Once seasoned, I like to let the chicken sit for a minute before cooking. This allows the salt to absorb slightly into the meat, helping it hold moisture better when it hits the pan.
Now, our chicken is perfectly seasoned and ready to cook! 🔥
Step 4: Choosing the Right Pan & Oil 🍳

Now, this is one of the most important steps. You can season your chicken perfectly, but if you use the wrong pan or oil, your chicken won’t cook properly—and that’s a big problem.
Choosing the Right Pan
Not all pans are created equal, and the one you use can make or break this dish. Here’s what works and what doesn’t:
✔️ Use a stainless steel sauté pan
- A thick-bottomed pan retains and distributes heat evenly, which is exactly what we need.
- It allows the chicken to brown beautifully while keeping the inside juicy.
✔️ Avoid thin pans
- A thin pan heats unevenly, causing some parts of the chicken to burn while others stay undercooked.
- These cheap pans just don’t hold heat well, and they create hot spots.
✔️ Cast iron? Not for this recipe
- Cast iron is great for many things, but not here. Why?
- It absorbs flavors, which means any sauce we make later might have a metallic or off taste.
- It holds heat too well, which makes it hard to control the temperature quickly.
💡 Chef’s Tip:
If you don’t have a stainless steel sauté pan, you can use a high-quality nonstick pan, but it won’t brown the chicken as well as stainless steel.
Choosing the Right Oil 🔥
Another big mistake people make is using the wrong oil. Not all oils are meant for high-heat cooking. Some burn too quickly, ruining the flavor.
✔️ Use a neutral, high smoke point oil
The best options are:
- ✅ Vegetable oil
- ✅ Canola oil
- ✅ Avocado oil
- ✅ Grapeseed oil
❌ Do NOT use fancy olive oil
- A lot of people think extra virgin olive oil is the best choice for everything, but it’s not good for high-heat cooking.
- Why? The flavor disappears when heated, and it has a low smoke point, meaning it burns too fast.
💡 How Much Oil Should You Use?
- You only need a thin layer—enough to coat the bottom of the pan.
- Too much oil = greasy chicken.
- Too little oil = uneven browning.
Now that we have the right pan and oil, it’s time to cook the chicken! 🔥
Step 5: Cooking the Chicken to Perfection 👨🍳
Now comes the most crucial step—actually cooking the chicken. This is where most people go wrong, and I get it. If you don’t understand how heat, moisture, and timing work together, you’ll end up with either dry, rubbery chicken or raw, unsafe chicken.
But don’t worry—I’ll walk you through it.
Step 5.1: Heating the Pan Properly 🔥
Before you add the chicken, you need to get the pan to the right temperature.
- ✔️ Turn the heat on high – A hot pan ensures that the chicken browns nicely instead of steaming.
- ✔️ Wait until the oil shimmers – This means the oil is hot enough. It should look like tiny waves moving across the surface.
- ✔️ A little smoke is okay – If you see a light haze of smoke, that means the oil is at the perfect temperature.
💡 How to Test the Pan’s Heat:
Before adding the chicken, take a small drop of water and flick it into the pan.
- If it sizzles immediately, your pan is ready.
- If it sits there and does nothing, it’s not hot enough yet.
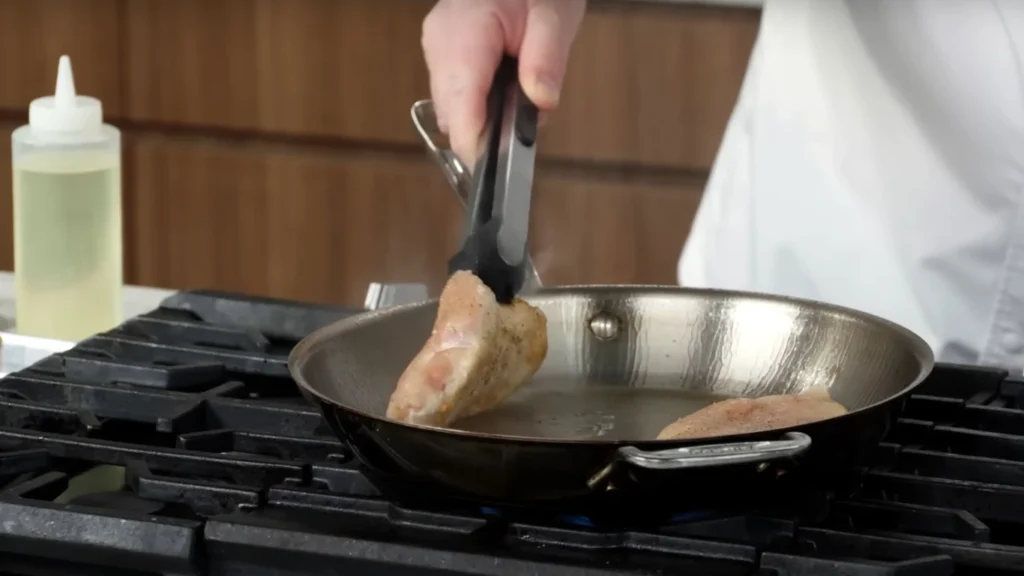
Step 5.2: Placing the Chicken in the Pan 🏗️
Okay, now we’re ready to add the chicken, but this part is tricky because it’s where most people accidentally mess up.
✔️ Dab off any extra moisture from the chicken with a paper towel.
- Why? Because any moisture on the chicken will cause steam, which prevents browning.
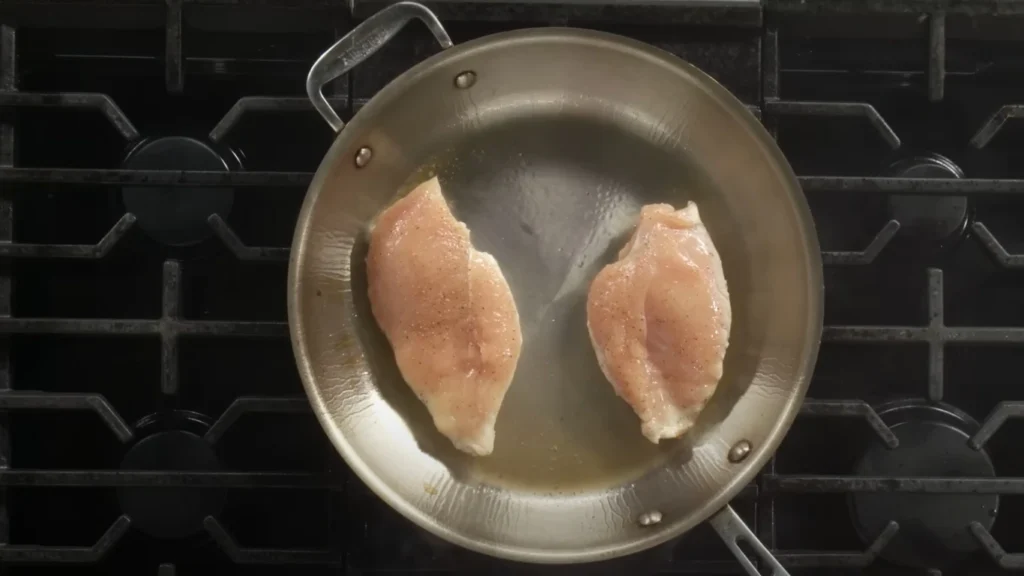
✔️ Drop it into the pan away from yourself.
- This keeps you from getting splashed with hot oil.
- If you drop it toward yourself, you risk burning your hands.
✔️ Do NOT touch it!
- This is the biggest mistake people make.
- Let it sit undisturbed so the bottom can develop that golden crust.
- If you move it around too much, you’ll rip off the crispy surface and leave half the flavor in the pan.
👀 How to Know When to Flip?
Chicken needs to be flipped only once. Constant flipping prevents browning and makes it cook unevenly.
- ✔️ Take a quick peek under the chicken.
- ✔️ If it’s golden brown and crisp, it’s ready to flip.
- ✔️ If it’s still pale, let it sit for another 30–60 seconds.
💡 Pro Tip :
If the chicken is sticking to the pan, it’s not ready yet! Once it’s browned properly, it will release naturally.
👆 Touch Test for Doneness
No thermometer? No problem. You can tell when chicken is cooked just by touching it.
- 🫧 Raw = Super Soft – Feels like pressing on your cheek.
- ⚡ Perfectly Cooked = Firm & Bouncy – Feels like pressing on the center of your palm.
- 🚫 Overcooked = Stiff – Feels like pressing on your knuckles—this means it’s dry!
🌡️ Using a Thermometer for Accuracy
If you want to be 100% sure, use a meat thermometer.
- ✔️ Perfect Temperature: 150–155°F – This is when you take the chicken off the heat.
- ✔️ Final Temperature: 165°F – The chicken will continue cooking as it rests (carryover cooking).
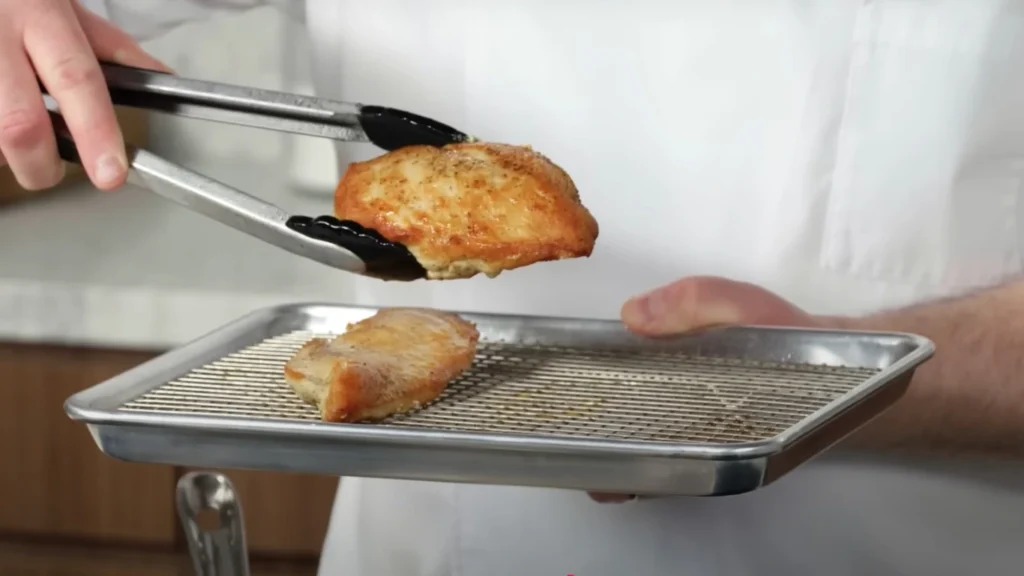
Why Resting the Chicken is So Important
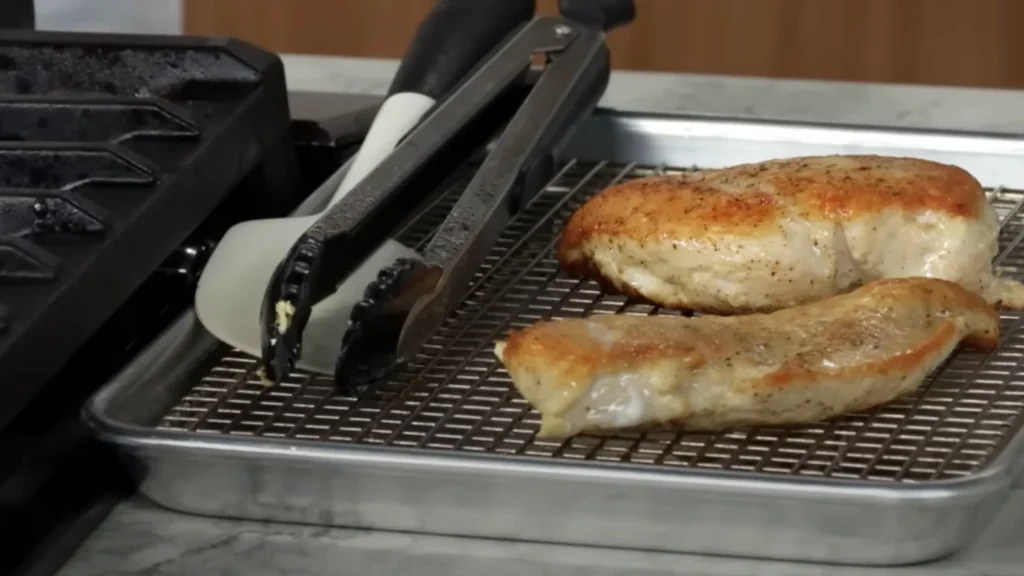
After removing the chicken from the pan, don’t slice into it right away! Let it rest for 5 minutes so the juices can redistribute inside the meat.
- ✔️ If you cut it too early, all the juices will run out onto the plate, leaving the chicken dry.
- ✔️ If you let it rest, the juices stay inside, keeping every bite juicy and flavorful.
Now, we have perfectly cooked chicken—golden brown on the outside, juicy on the inside. Let’s move on to making the sauce! 🍷
Step 6: Making the Best Pan Sauce 🍷
A great pan sauce is what takes this simple chicken dish from good to restaurant-quality. This sauce is rich, flavorful, and silky smooth—and the best part? It’s super easy to make.
What is Fond? And Why Is It So Important?
The key to an amazing sauce starts with something called fond.
- ✔️ Fond = all those brown bits left in the pan after cooking the chicken.
- ✔️ This is pure flavor gold—it’s where all the caramelized, concentrated chicken flavor is.
- ✔️ If you don’t use the fond, you’re throwing away the best part of the dish!
💡 Never scrape out the pan after cooking chicken! Those brown bits are essential for building a deep, rich sauce.
How to Make a Simple Yet Incredible Sauce
Now, let’s build the sauce step by step.

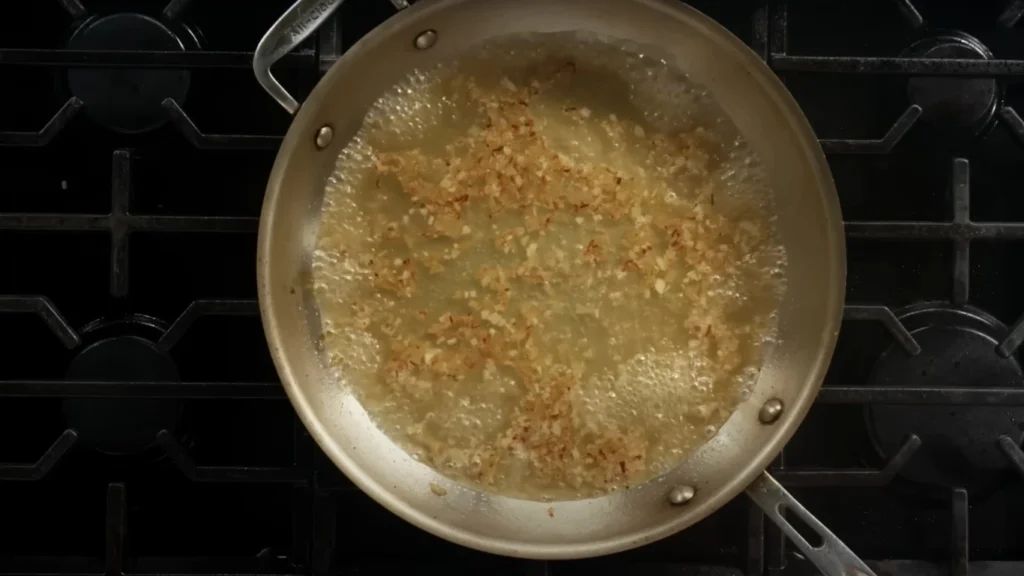
1️⃣ Sauté Shallots & Garlic
- First, add a little fresh oil to the pan (just enough to coat the bottom).
- Add finely diced shallots and cook for about 1 minute until they start to soften and become translucent.
- Add minced garlic and cook for 30 seconds—until it’s fragrant (but not browned! Burnt garlic = bitter sauce).
💡 Why cook shallots before garlic?
- Shallots take longer to cook than garlic, so if you add them at the same time, the garlic will burn before the shallots soften.
2️⃣ Deglaze the Pan with Chicken Stock
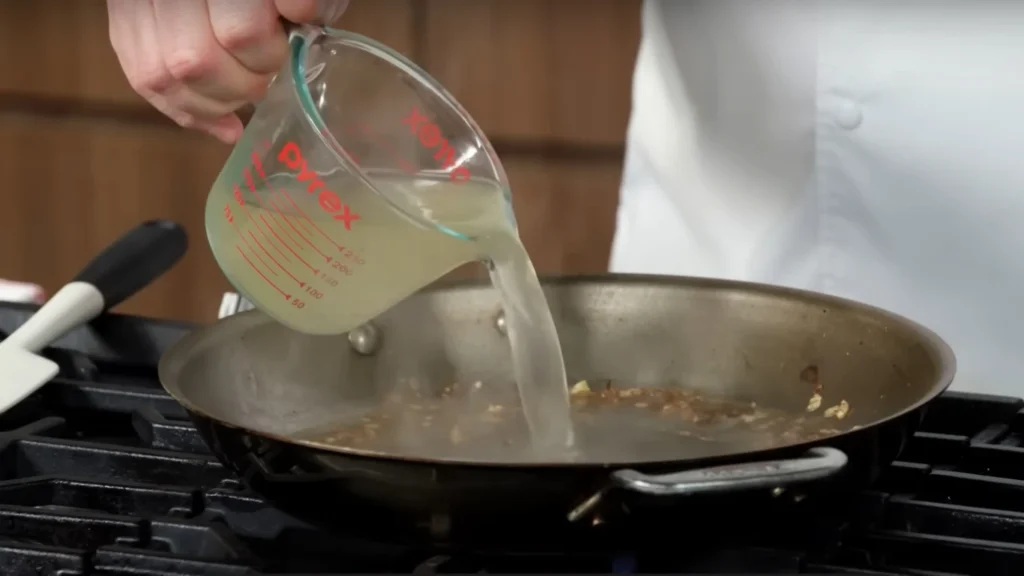
- Pour ½ to ¾ cup of chicken stock into the pan.
- Use a wooden spoon to scrape up the fond (all those delicious brown bits stuck to the bottom).
✔️ This step lifts all the flavor from the pan into the sauce.
✔️ The stock adds depth and a savory, umami-rich base.
3️⃣ Reduce for 7–8 Minutes
- Turn the heat to medium-high and let the sauce simmer.
- This concentrates the flavor by evaporating excess water.
✔️ The sauce will reduce by half, meaning it will get thicker and more flavorful.
✔️ You’ll know it’s reducing properly when the bubbles start getting bigger.
💡 Watch the Bubbles!
- Small bubbles = sauce is still watery.
- Bigger, slower bubbles = the sauce is thickening and almost ready.
4️⃣ Add Any Leftover Chicken Juices
- While the chicken is resting, juices will collect on the plate.
- Pour those juices into the sauce! This adds even more chicken flavor.
💡 Do NOT add any fat or oil that has separated—just the juices.
5️⃣ Stir in Butter – This Makes the Sauce Silky & Rich 🧈
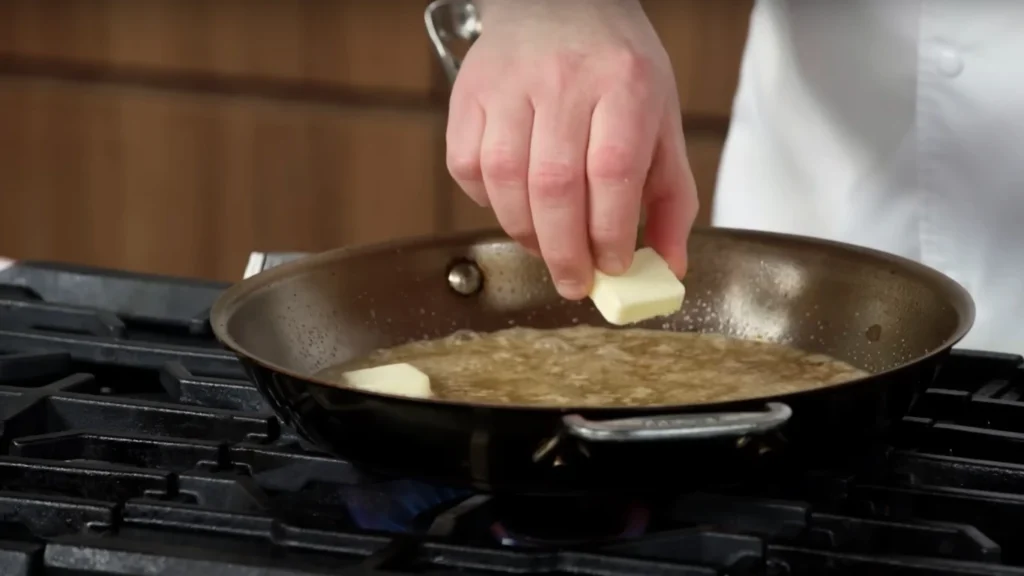

- Turn the heat to low and stir in 1–2 tablespoons of cold butter.
- The butter will melt slowly and make the sauce creamy and luscious.
✔️ This process is called “monter au beurre” (French for “mounting with butter”).
✔️ It helps thicken the sauce while giving it a glossy, restaurant-quality finish.
💡 The trick: Keep stirring the sauce as the butter melts so it fully emulsifies instead of separating.
6️⃣ Finish with Lemon Juice – Adds Brightness & Balance 🍋
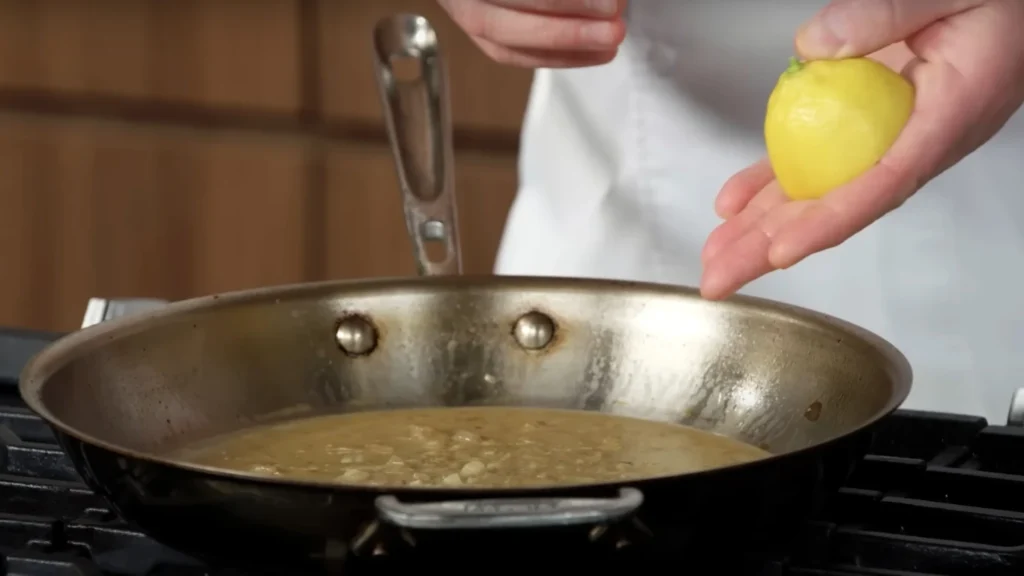
- Squeeze ½ a lemon into the sauce (about 1 tablespoon of juice).
- Lemon cuts through the richness and gives the sauce a fresh, bright flavor.
💡 Pro Tip: Hold the lemon cut-side up when squeezing—this traps the seeds in your hand so they don’t fall into the sauce.
7️⃣ Sprinkle in Fresh Parsley – Color & Freshness 🌿
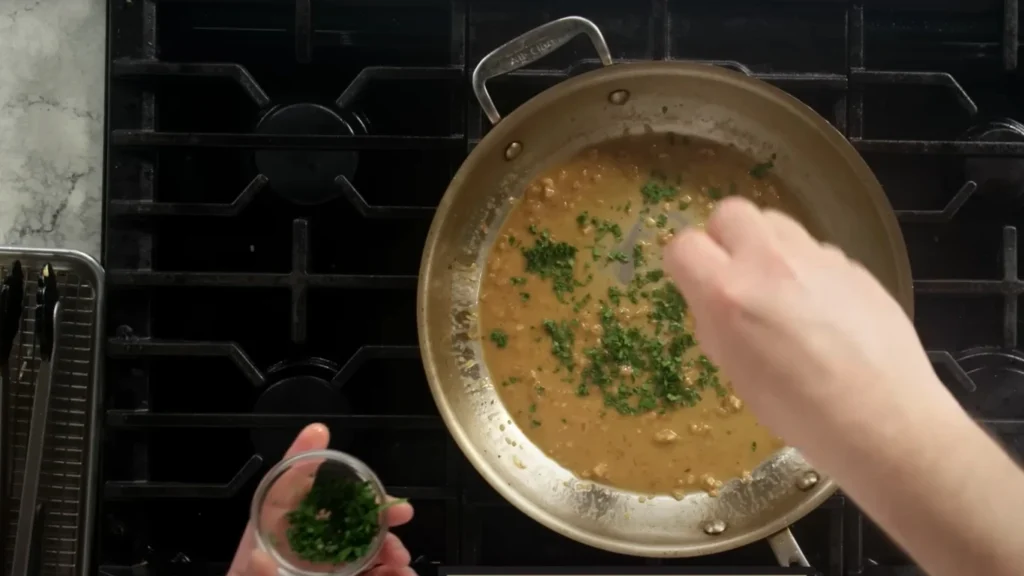
- Chop up some fresh parsley and stir it into the sauce right at the end.
- This gives the sauce a pop of color and a light, herby flavor.
💡 Why add parsley at the end?
- If you cook it too long, it loses its bright green color and fresh taste.
🌟 Final Sauce Check: Is It the Right Consistency?
The sauce should be thick enough to coat the back of a spoon (this is called “nappé” in French cooking).
- ✔️ Test: Dip a spoon into the sauce and run your finger through it.
- ✔️ If the line stays clear and the sauce doesn’t run back together, it’s perfectly reduced.
- 💡 If it’s too thin: Let it simmer for another minute.
- 💡 If it’s too thick: Add a splash of chicken stock to loosen it.
The Sauce is Ready! 🍷
Now, we have a silky, flavorful pan sauce that’s loaded with depth from the fond, brightened with lemon, and finished with butter for richness.
Next up—let’s slice the chicken and plate it beautifully! 🍽️🔥
Step 7: Slicing & Plating Like a Pro 🍽️
Now that we have perfectly cooked chicken and a silky, flavorful pan sauce, it’s time to slice and plate like a professional chef.
Slicing the Chicken the Right Way 🔪
✔️ Always slice chicken at an angle (diagonal cuts)
- This makes the chicken more tender by shortening the muscle fibers.
- It looks better—a long, clean slice is much more visually appealing than small, choppy cuts.
✔️ Use a sharp knife
- A dull knife will tear the meat, making it look shredded and uneven.
- A sharp knife gives you smooth, professional-looking slices.
✔️ Slice against the grain
- This makes the chicken easier to chew because it shortens the muscle fibers.
- If you slice with the grain, the meat will be tougher and chewier.
💡 Pro Tip: Keep the slices medium-thick—if they’re too thin, the chicken cools down too quickly.
The “Chef’s Snack” – What to Do with the End Pieces 😋
- ✔️ The very end of the chicken breast tends to be a little drier than the rest.
- ✔️ Instead of serving it, I call it the “chef’s snack”—I eat it while plating the rest!
Let’s be honest—after all this work, you deserve the first bite!
How to Plate Like a Pro 🍽️
Plating is more than just making food look pretty—it also affects texture and taste.
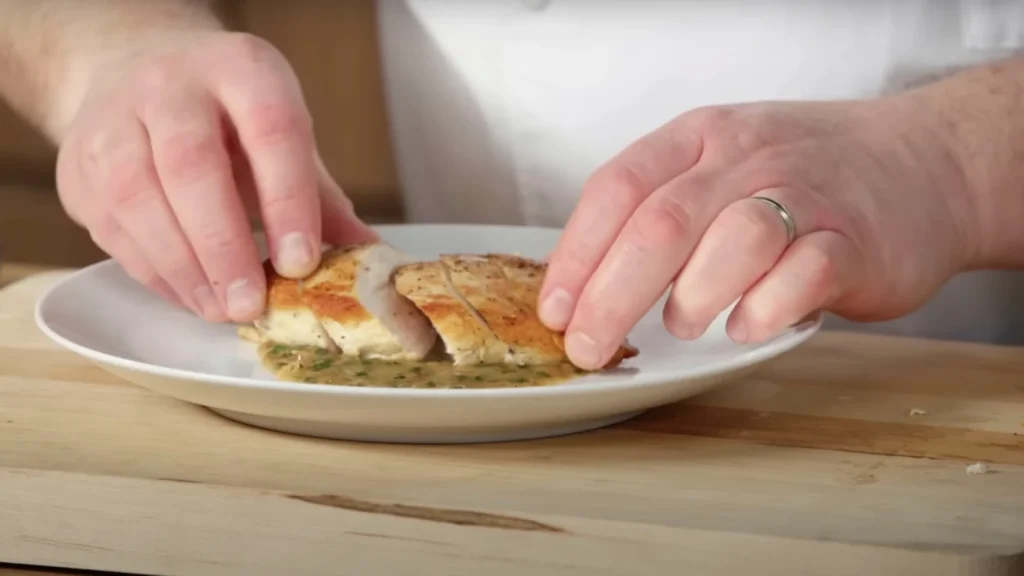
✔️ Step 1: Place the sauce UNDER the chicken
- A lot of people pour sauce on top of the chicken, but that’s a mistake.
- If you pour the sauce over the chicken, you lose that crispy, golden crust that we worked so hard to get.
- Instead, I like to spoon the sauce onto the plate first and place the sliced chicken on top of it.
✔️ Step 2: Arrange the slices slightly overlapping
- This makes it look elegant and appetizing.
- It also keeps the chicken warm longer by minimizing surface exposure to air.
✔️ Step 3: Garnish with fresh parsley 🌿
- A little extra chopped parsley adds a pop of color and freshness.
- Always use fresh herbs—dried parsley won’t give you the same effect.
✔️ Step 4: Serve immediately 🔥
- Chicken is best enjoyed hot and juicy, straight from the pan.
- If you let it sit too long, it starts to dry out and lose its crispiness.
💡 Pro Tip:
Serve with a side of sauce on the plate so people can dip each bite.
Final Check: How Does It Look? 🤩
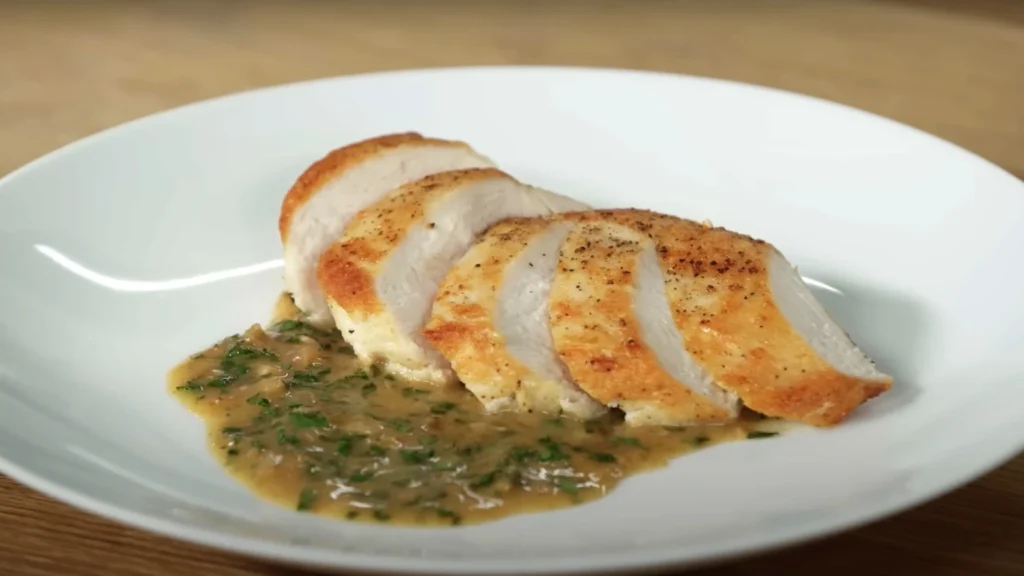
- ✅ The chicken has a beautiful golden-brown crust.
- ✅ The sauce is silky and glossy, pooled gently under the chicken.
- ✅ The garnish adds a touch of freshness.
- ✅ The slices are neatly arranged, slightly overlapping.
This is restaurant-quality plating—and now it’s time for the best part: eating! 🍴🔥
Step 8: The First Bite & Enjoying Every Moment 😍
Finally, after all the prep, cooking, and plating, it’s time for the best part—eating!
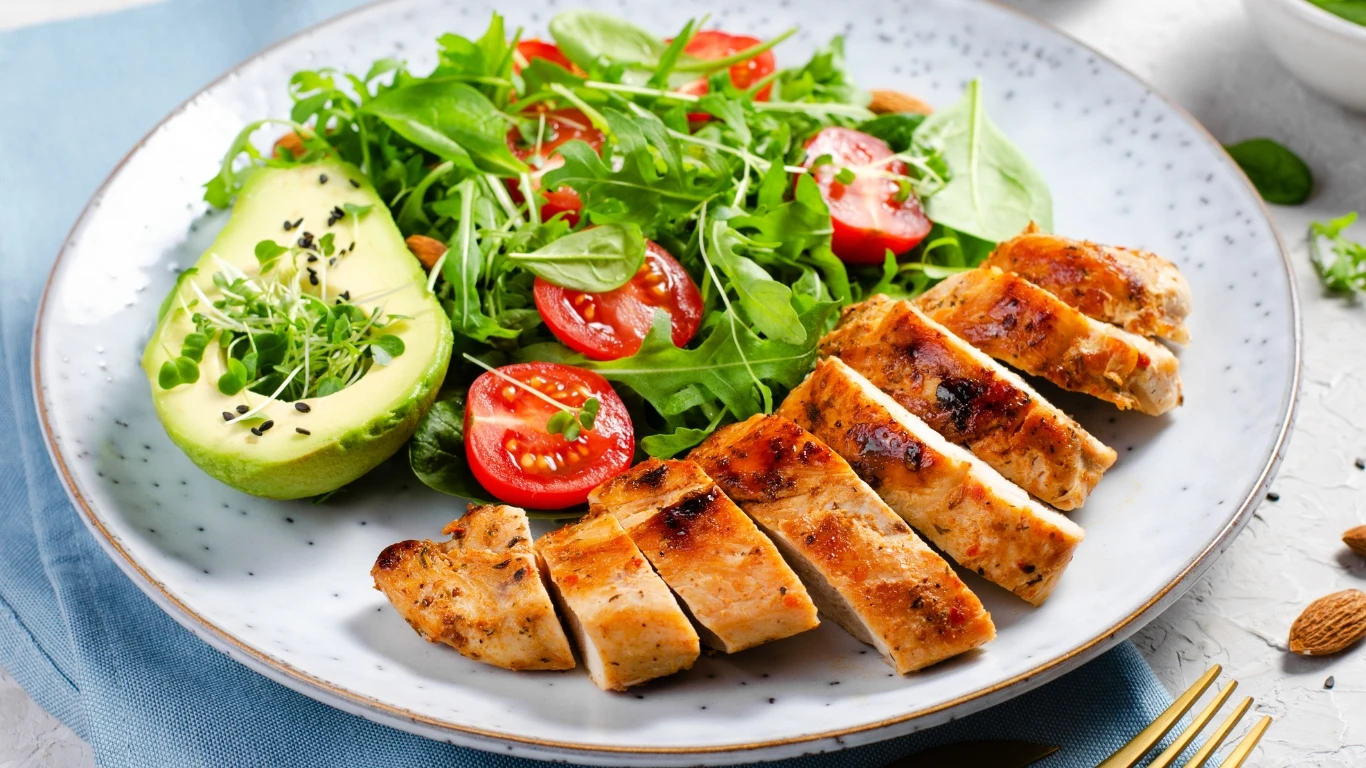
I take my fork, grab a perfectly sliced piece, and dip it right into that creamy, flavorful sauce. The outside is golden and slightly crisp, the inside is unbelievably juicy, and the sauce ties everything together with a rich, velvety finish.
This is exactly what chicken breast should be—soft, tender, and packed with flavor.
📢 Final Tip: Make Every Bite Count
If you’re doing this right, here’s what should happen:
- ✔️ Each bite should be coated in that silky sauce—no dry chicken allowed!
- ✔️ You should be mopping up the sauce with every forkful.
- ✔️ By the time you’re done, your plate should be spotless—because leaving behind even a drop of that sauce would be a crime.
💡 Pro Move:
Take a slice of chicken, swirl it through the sauce, and let it soak up all the flavors before taking a bite. That’s how you do it like a pro.
👉 Remember This:
- ✔️ Chicken breast doesn’t have to be dry—when cooked properly, it’s incredibly juicy and delicious.
- ✔️ A little technique goes a long way—just understanding the right way to slice, season, and cook makes all the difference.
With just a few simple adjustments, you’ve now mastered the art of perfectly cooked chicken breast—the kind that belongs in a restaurant.
👨🍳 Happy cooking! 🍗🔥
Note
You can Also Read the The Best Banana Bread Recipe – A Personal Step-By-Step Guide 🍌🍞
Chicken Breast Recipe
Ingredients
- 2 boneless, skinless chicken breasts - small to medium size
- 1 tsp kosher salt - adjust to taste
- ½ tsp freshly cracked black pepper
- 1 tsp vegetable oil - or any neutral high-smoke point oil
- 1 tsp Vegetable oil - for sautéing
- 1 small shallot - finely diced
- 2 cloves garlic - minced
- ¾ cup chicken stock - low sodium preferred
- 1 tsp cold unsalted butter
- 1 tsp lemon juice - freshly squeezed
- 1 tsp chopped fresh parsley
Instructions
Prepare the Chicken
- Choose the Right Chicken Breast – Pick smaller chicken breasts for better texture and even cooking.
- Slice for Even Cooking – If your chicken is thicker than ¾ inch, place your flat hand on top and slice it horizontally into two thinner fillets.
- Pat Dry Completely – Use a paper towel to remove any excess moisture.
Season the Chicken
- Season both sides with kosher salt and black pepper.
- Let it sit for 2 minutes to help the salt absorb into the chicken.
Heat the Pan
- Use a stainless steel sauté pan (or nonstick if preferred).
- Heat 1 tablespoon of vegetable oil over medium-high heat.
- Wait until the oil shimmers (looks like tiny waves) before adding the chicken.
Sear the Chicken
- Carefully place the chicken in the pan – Always lay it away from you to avoid oil splashes.
- Do NOT move the chicken – Let it cook undisturbed for 5–6 minutes until golden brown.
Flip & Finish Cooking
- Flip the chicken only once.
- Cook for another 4–6 minutes until it reaches an internal temperature of 150–155°F.
- Remove from heat and let it rest on a plate for 5 minutes (carryover cooking will bring it to 165°F).
Make the Pan Sauce
- In the same pan, reduce heat to medium and add 1 teaspoon oil.
- Sauté shallots for 1 minute until soft.
- Add garlic and cook for 30 seconds (don’t let it burn!).
- Pour in ¾ cup chicken stock and scrape up the brown bits (fond) from the pan.
- Simmer for 7–8 minutes, until the liquid reduces by half.
Finish the Sauce
- Stir in butter and let it melt into the sauce.
- Squeeze in lemon juice and mix well.
- Sprinkle in fresh parsley for color and flavor.
Slice & Plate
- Slice the chicken at a long angle for the best texture.
- Spoon the sauce onto the plate first, then place the chicken on top.
- Garnish with extra parsley and serve immediately.
Notes
- Use a thermometer – Remove at 150–155°F (carryover cooking brings it to 165°F).
- If no thermometer, use the touch test – A perfectly cooked chicken breast should be firm with a slight bounce.
- Do NOT overcook – Pull it off the heat before it reaches 165°F.
- Let it rest – This allows the juices to redistribute inside the meat.
- Always pat dry before searing – Moisture prevents browning.
- Store leftovers in an airtight container in the fridge for up to 4 days.
- Reheat gently in a pan over low heat with a splash of water or chicken stock to keep it juicy.
Some Important Additional Tips to Keep in Mind
1. How to Prevent Dry Chicken Breast?
- ✅ Choose Smaller Breasts – Smaller pieces cook more evenly and tend to be naturally more tender.
- ✅ Slice Thick Breasts in Half – If the breast is too thick, cut it horizontally to create two thinner fillets for even cooking.
- ✅ Let Chicken Reach Room Temperature – Let it sit for 15–20 minutes before cooking so it cooks evenly.
- ✅ Pat Chicken Completely Dry – Moisture on the surface prevents proper browning and leads to steaming instead of searing.
- ✅ Cook Over Medium-High Heat – A hot pan ensures a golden crust without drying out the inside.
- ✅ Use a Meat Thermometer – Remove chicken at 150–155°F (carryover cooking will bring it to 165°F while resting).
- ✅ Let It Rest Before Slicing – Rest for at least 5 minutes so the juices can redistribute inside the meat.
2. Alternative Cooking Methods for Chicken Breast
While pan-searing is a great way to cook chicken breast, there are other methods that can deliver equally juicy and flavorful results. Each method has its own benefits, depending on what you’re looking for.
1️⃣ Baking (Oven-Roasted Chicken Breast)
✔️ Best For: Easy, hands-off cooking
✔️ How to Do It:
- Preheat oven to 400°F (200°C).
- Season chicken and place on a baking sheet with parchment paper.
- Bake for 18–22 minutes, depending on thickness.
- Remove when it reaches 155°F and let it rest to reach 165°F.
💡 Pro Tip: For extra moisture, rub the chicken with olive oil or butter before baking.
2️⃣ Grilling 🔥
✔️ Best For: Smoky flavor & summer cooking
✔️ How to Do It:
- Preheat grill to medium-high heat.
- Brush grates with oil to prevent sticking.
- Grill for 5–7 minutes per side, flipping once.
💡 Pro Tip: Marinate the chicken for 30 minutes to 1 hour before grilling for extra tenderness.
3️⃣ Sous Vide (Most Foolproof Method)
✔️ Best For: Perfectly even cooking, no risk of overcooking
✔️ How to Do It:
- Set a sous vide machine to 145°F (63°C).
- Seal the chicken in a vacuum bag or ziplock and cook for 1.5 to 2 hours.
- Sear in a hot pan for 1 minute per side for a crispy crust.
💡 Why Use Sous Vide? This method locks in moisture and prevents overcooking, making it perfect for meal prep.
4️⃣ Poaching (Boiling Chicken for Tenderness)
✔️ Best For: Shredded chicken (great for salads, tacos, and soups)
✔️ How to Do It:
- Place chicken in a pot and cover with cold water or broth.
- Bring to a gentle simmer (not a rolling boil!).
- Cook for 12–15 minutes, then let it rest for 5 minutes before shredding.
💡 Pro Tip: Add garlic, onion, or bay leaves to the water for extra flavor.
3. Customizing the Recipe for Different Flavors
Once you master the basic technique, you can switch up the flavors to match different cuisines. Here are a few ways to customize the recipe:
1️⃣ Mediterranean Chicken 🇬🇷
- ✔️ Season with oregano, garlic, lemon zest, and paprika.
- ✔️ Serve with a side of tzatziki sauce and Greek salad.
2️⃣ Garlic Butter Chicken 🧄🧈
✔️ Cook chicken as directed, then finish with a garlic butter drizzle (melt butter, add minced garlic, cook for 30 seconds, then pour over the chicken).
3️⃣ Spicy Cajun Chicken 🌶️
- ✔️ Season with Cajun seasoning, smoked paprika, and cayenne pepper.
- ✔️ Serve with a creamy ranch or honey mustard dip.
4️⃣ Teriyaki Chicken 🍣
- ✔️ Glaze with teriyaki sauce in the last 2 minutes of cooking.
- ✔️ Serve with steamed rice and stir-fried veggies.
5️⃣ Lemon Herb Chicken 🍋
- ✔️ Add fresh rosemary, thyme, and lemon zest before cooking.
- ✔️ Serve with roasted potatoes and asparagus.
4. How to Tell If Chicken Breast is Truly Done Without a Thermometer
If you don’t have a meat thermometer, here are a few ways to check if your chicken is cooked through:
✔️ The Juice Test:
- Poke the thickest part with a fork. If the juices run clear (not pink), it’s done.
✔️ The Finger Press Test:
- Raw chicken feels very soft.
- Perfectly cooked chicken has a slight bounce when pressed.
- Overcooked chicken feels stiff and firm.
✔️ The Cut Test (As a Last Resort)
- If unsure, make a small slice in the thickest part—it should be white inside with no pink.
- Downside: Cutting too early lets out the juices, so use this method only if necessary.
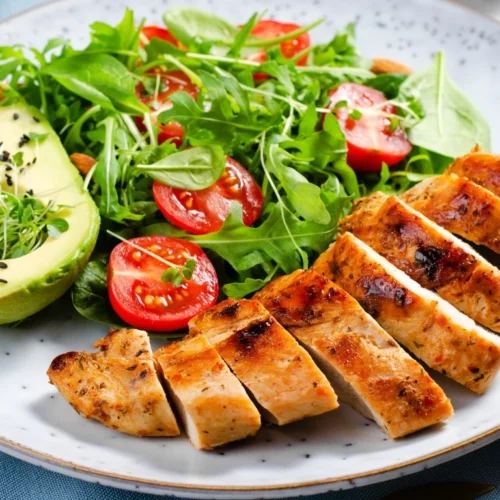
5. Perfect Side Dishes to Pair with This Chicken
The beauty of this juicy chicken breast is that it pairs well with almost anything!
🍚 Carb-Based Sides:
- ✔️ Garlic Mashed Potatoes – Creamy and buttery, perfect with pan sauce.
- ✔️ Steamed Rice – Simple and fluffy. Add fresh herbs for extra flavor.
- ✔️ Quinoa or Couscous – A healthy, protein-packed alternative.
🥦 Vegetable Sides:
- ✔️ Roasted Brussels Sprouts – Tossed in olive oil, garlic, and parmesan.
- ✔️ Steamed Broccoli or Asparagus – Light and fresh.
- ✔️ Grilled Zucchini and Peppers – Perfect for summer meals.
🥗 Light & Fresh Pairings:
- ✔️ Greek Salad – Cucumbers, tomatoes, feta, and olives.
- ✔️ Caesar Salad – Classic, crunchy, and creamy.
- ✔️ Coleslaw – A tangy, refreshing contrast to the chicken.
6. How to Store & Reheat Leftover Chicken Without Drying It Out
1️⃣ How to Store Leftover Chicken
- ✔️ Let the chicken cool completely before storing.
- ✔️ Keep in an airtight container in the fridge for up to 4 days.
- ✔️ For longer storage, freeze in a ziplock bag for up to 3 months.
2️⃣ Best Ways to Reheat Without Drying It Out
- ✔️ Stovetop (Best Method) – Heat a pan over medium heat, add a splash of water or chicken stock, and cover with a lid for 2–3 minutes.
- ✔️ Oven (For Larger Portions) – Wrap chicken in foil and bake at 275°F (135°C) for 10–15 minutes.
- ✔️ Microwave (Quickest Option) – Place chicken on a plate, cover with a damp paper towel, and microwave in 30-second intervals to prevent drying out.
🚫 Avoid reheating at high temperatures—this causes moisture loss and rubbery texture.
7. How to Make It a Full Meal (Sauce Variations & Add-Ons)
Want to switch up the pan sauce? Here are some variations:
1️⃣ Creamy Garlic Sauce 🧄
- ✔️ Add ¼ cup heavy cream after deglazing with stock.
- ✔️ Stir in parmesan cheese for extra richness.
2️⃣ Honey Mustard Sauce 🍯
- ✔️ Mix 1 tablespoon Dijon mustard + 1 teaspoon honey into the sauce.
- ✔️ Perfect for a sweet & tangy twist.
3️⃣ Mushroom & White Wine Sauce 🍄
- ✔️ Sauté sliced mushrooms with shallots before adding stock.
- ✔️ Add ¼ cup white wine for depth.
4️⃣ Tomato Basil Sauce 🍅
- ✔️ Add cherry tomatoes and fresh basil for a Mediterranean touch.
- ✔️ Finish with a drizzle of olive oil.