
Nothing is better than a ready-made, cheesy breakfast ready to go, especially on slow weekends or special mornings. This breakfast casserole recipe is one of those dishes that feels is full of flavor without needing a ton of effort.
It’s perfect for holidays like Christmas or Thanksgiving, but honestly, you can make it any day of the year. I’ve made this for family brunches, weekend meal prep, and even lazy Sundays when I want to prepare something easy and delicious.
One of the best things about this recipe is that you can prep it the night before. This casserole has it all: savory sausage, crispy hashbrowns, soft eggs, melted cheese, and that little bit of veggie freshness from the peppers. It’s rich, filling, and always a crowd-pleaser.
It’s simple, it’s comforting, and it’s packed with layers of flavor—from crispy hashbrowns to savory sausage, melty cheese, and fluffy eggs. We will guide you step by step with helpful tips, and all the details to make it just right.
Step 1: Browning the Sausage – The Heart of the Dish
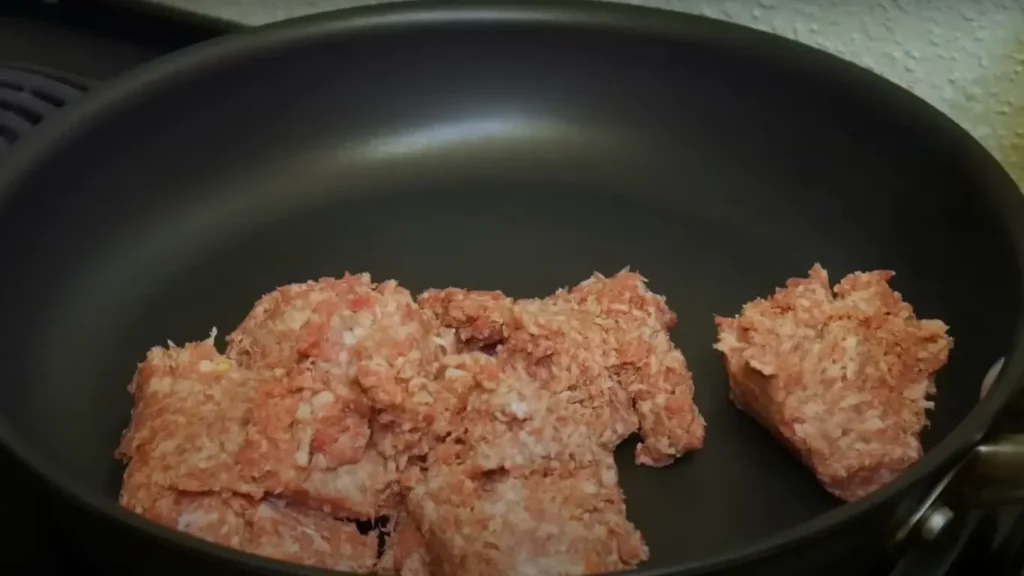
I always like to start this recipe by cooking the sausage first. I use a nonstick skillet and set the heat to medium. You don’t need to add any oil at all—the sausage already has enough fat in it to cook itself. As it starts to heat up, you’ll see the fat slowly melting and sizzling in the pan. That’s exactly what we want.
As the sausage cooks, I use a wooden spoon or spatula to break it up into small crumbles. This way, it gets nicely browned all over and cooks evenly. I usually keep stirring and flipping the pieces for several minutes until they’re no longer pink and have a slightly crispy edge. That’s when I know it’s just right.
- 🍳 Why I don’t drain the sausage grease: Some people might be tempted to drain off the fat, but I don’t do that right away. The oils released from the sausage are full of flavor, and they help cook the next ingredients—like the bell peppers—without needing extra oil.
- 👩🍳 Pro Tip: If you want to switch things up or give this dish a slightly different taste, try using smoked sausage or even chorizo. They bring a bold, rich flavor that pairs really well with the eggs and potatoes. And if you don’t eat pork or are making this for guests with dietary preferences, you can also use turkey sausage. It’s leaner but still tastes great in this recipe.
- 🔄 Make-Ahead Tip: You can cook the sausage a day in advance and keep it in the fridge. That way, your prep the next day will be even faster—especially helpful if you’re hosting brunch or making this early in the morning.
By the time the sausage is fully cooked, the kitchen already smells amazing 😍. It’s a warm, cozy smell that makes you excited for the rest of the casserole. And don’t worry—we’re just getting started!
Step 2: Adding Color with Bell Peppers

After the sausage is cooked and has released all those tasty oils, it’s time to add in the bell peppers. I usually go for 1 cup of green bell pepper and 1 cup of red bell pepper, both diced into small pieces. You can use more or less depending on how much color and flavor you want in your casserole.
The red and green peppers don’t just taste good—they make the whole dish look bright and festive. I always think of the holidays when I make this recipe, especially when those colors start to peek through the cheese and eggs later on. It’s like the casserole is dressed up for Christmas morning. 🎄
I let the peppers cook for about 3 to 5 minutes, just until they start to soften but still keep their color and a little crunch. That little bit of bite adds a nice contrast to the creamy eggs and melty cheese later.
- 🥄 Cooking Tip: If you want to add even more flavor and texture, you can toss in some chopped onions, mushrooms, or even zucchini at this stage. Just remember:
- 🍄 Mushrooms release a lot of moisture, so be sure to cook them down well or sauté them separately first.
- 🧅 Onions will add sweetness as they cook, which balances the saltiness of the sausage.
- 🥒 Zucchini is great for a lighter version but should be diced small and cooked thoroughly so it doesn’t water down the casserole.
- 💡 Make It Your Own: Don’t be afraid to mix it up with yellow or orange bell peppers, too! They all add sweetness and make the dish even more colorful.
At this point, the smell coming from the pan is amazing. The sausage, mixed with the lightly cooked peppers, gives off a savory aroma that feels like comfort food at its finest 😋. And this is just step two—we’ve still got plenty of deliciousness ahead.
Step 3: Whisking the Egg Mixture
Now that the sausage and veggies are ready, it’s time to put together the part that really brings the casserole to life—the egg mixture. This is what makes everything hold together and gives the final dish that soft, fluffy texture I love.
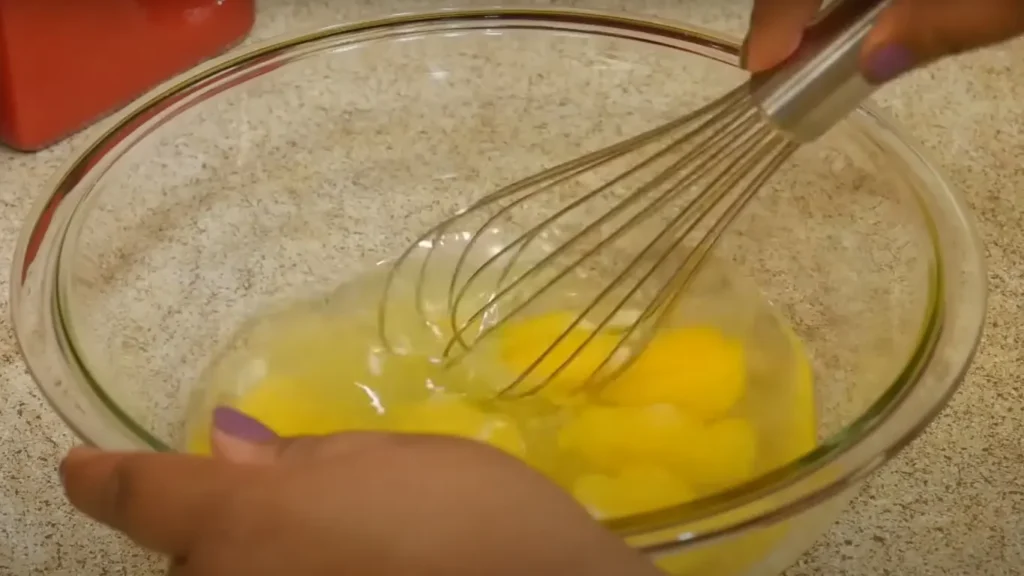
I grab a large mixing bowl and crack in six large eggs. I give them a really good whisk until the yolks and whites are completely blended and smooth. This helps make sure the texture of the casserole is even once it’s baked.
Then I season it with:
- 🧂 ½ teaspoon of salt – to enhance all the flavors.
- 🌑 ½ teaspoon of black pepper – for a little warmth.
- 🧄 ½ teaspoon of garlic powder – because garlic just makes everything better!
- 🥛 1 cup of whole milk – for that creamy texture.
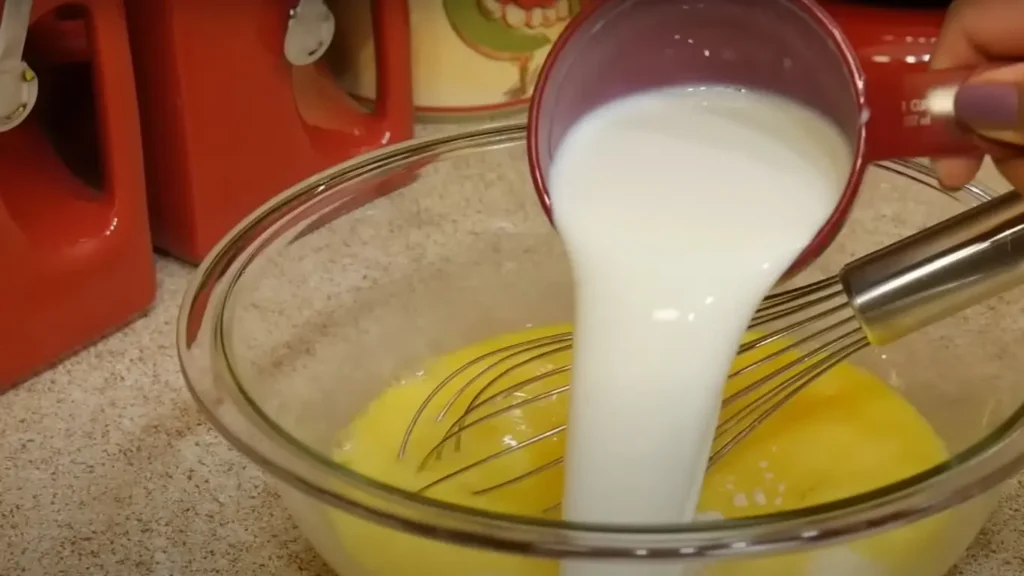
I like using whole milk because it gives the eggs a richer, softer finish. But sometimes, if I have it on hand, I use evaporated milk instead. It makes the casserole feel a little more indulgent, which is perfect for holidays or special mornings.
Chef Tip
Don’t skip the milk! Without it, the casserole turns out dry and less custardy. If you’re out of milk, even half-and-half or a mix of milk and cream can work in a pinch.
- 🔁 Make It Lighter: If you’re looking to lighten it up, you can swap the whole eggs for a few egg whites or use low-fat milk, but keep in mind the texture might be a little less rich.
🌶️ Optional but Totally Worth It:
Before I pour the mixture into the casserole, I usually add a few dashes of hot sauce. This part is totally optional, but I highly recommend it—especially if you like a little kick in your breakfast.
I use whatever hot sauce I have around, but something like a mild habanero or smoky chipotle adds great flavor without being overwhelming.
- 🔥 Pro Tip: If you’re making this for guests, you can keep the hot sauce out of the eggs and instead offer it on the side so everyone can control their own level of heat.
Once the eggs are seasoned and whisked with milk, I set the bowl aside for a minute while I get my baking dish ready. This mixture is going to be poured over the layers later, and it will soak into everything—binding the hash browns, sausage, peppers, and cheese together into one amazing, hearty breakfast.
Step 4: Prepping the Casserole Dish
Now that the egg mixture is ready and waiting, it’s time to set up the baking dish. I use a 9×13-inch casserole dish, which is the perfect size for this recipe. It gives plenty of room for all the layers and makes enough to feed a crowd—or leave leftovers for tomorrow’s breakfast (which is always a win 😋).
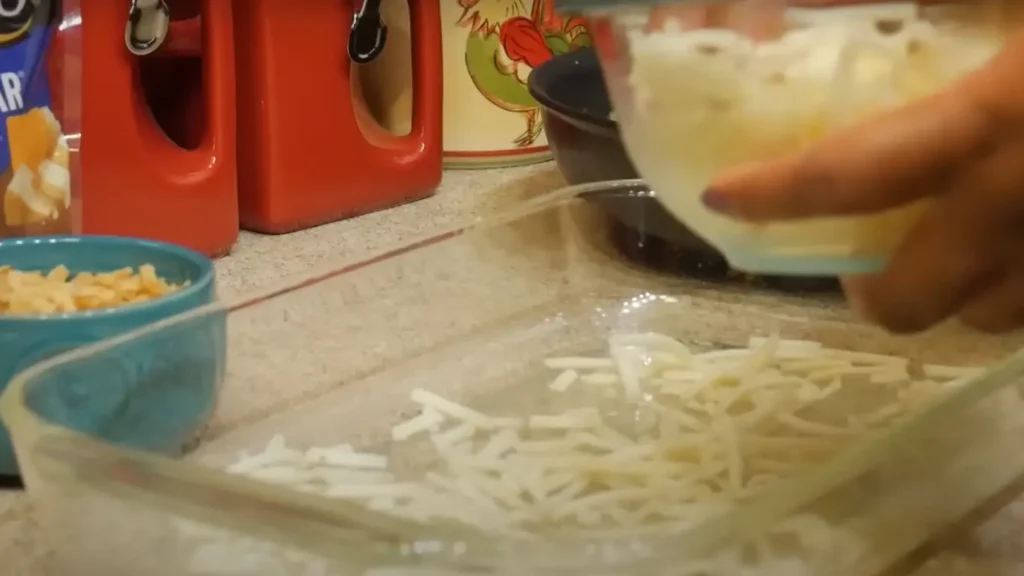
Before adding anything in, I spray the entire dish with nonstick cooking spray. And when I say the whole dish, I mean the bottom and all the sides, too. You want everything to slide out easily once it’s baked, especially the golden edges of melted cheese that tend to stick if the dish isn’t greased properly.
- 🔧 Cooking Tip:
If you don’t have spray on hand, you can use a little bit of oil or melted butter and a paper towel or brush to coat the inside of the dish. The key is just making sure nothing sticks and cleanup is easy afterward. - 🧀 Why this step matters:
I’ve made the mistake before of forgetting to grease the dish, and let me tell you—it’s heartbreaking to see all that cheesy crust glued to the pan instead of on your plate. So don’t skip this step, even if you’re in a hurry. - 💡 Bonus Tip:
If you want extra crispy edges, sprinkle a small handful of shredded cheese on the bottom of the dish before adding the other ingredients. It forms a delicious, cheesy crust when baked!
Once the dish is greased and ready to go, I place it to the side—it’s layering time next! This is where the casserole really starts to take shape, and everything comes together. 💛
Step 5: Layering the Good Stuff
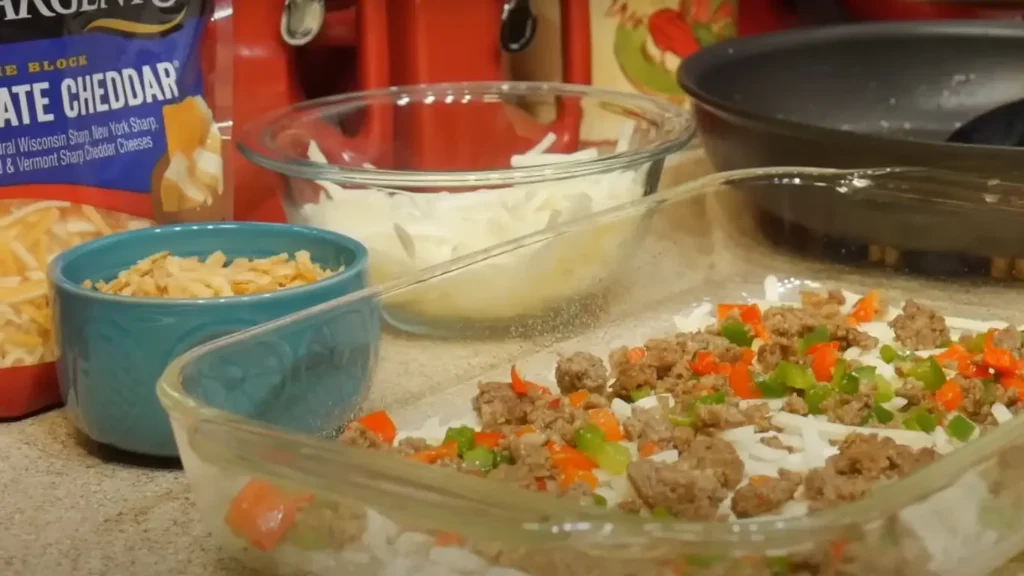
This is my favorite part—layering all the delicious ingredients. It feels a bit like putting together a cozy breakfast puzzle, and when you do it right, every bite ends up full of flavor, crunch, and creaminess. 😍
I take my greased 9×13 dish and start building the layers, kind of like a breakfast lasagna—only instead of noodles, we’re working with hash browns, sausage, cheese, and veggies. Let’s break it down step by step.
Here’s how I layer it:
- Start with half of the frozen hash browns.
I spread them out evenly across the bottom. These form the base and do a great job soaking up the egg mixture later. They also give the casserole a soft, hearty texture that feels like comfort in every bite. - Add half of the sausage and pepper mix.
I spoon the mixture over the hash browns, trying to spread it out so there’s a little sausage and veggie in every spot. That mix of savory meat and colorful bell pepper already smells amazing. 🌈 - Sprinkle on half of the crispy fried onions.
This is where things get interesting. These onions add a light, crunchy layer that gives the casserole a little surprise in every forkful. It’s one of those ingredients that makes people go, “Ooh, what’s that?” in the best way. - Add a layer of shredded cheddar cheese.
I usually do a mix of mild and sharp cheddar because it gives the perfect balance—mild for that creamy melt, and sharp for bold flavor. 🧀
After that, I just repeat all the layers again:
- The rest of the hash browns
- The second half of the sausage and peppers
- The rest of the fried onions
- And, of course, a final blanket of cheese on top
It’s such a satisfying process—kind of like building something warm and cheesy that you just know is going to make your morning better. 💛
Chef Tip
Don’t be afraid to switch up the cheese. I’ve used Monterey Jack, pepper jack, and even smoked gouda before, and they all turn out great.
If you love that gooey, stretchy melt, toss in some mozzarella with the cheddar. It adds a beautiful pull when you slice into it!
- 🔄 Custom Option:
You can even sneak in a handful of spinach, cooked mushrooms, or crumbled bacon in between layers if you want to bulk it up or make it a bit more gourmet.
Step 6: Pouring the Eggs In
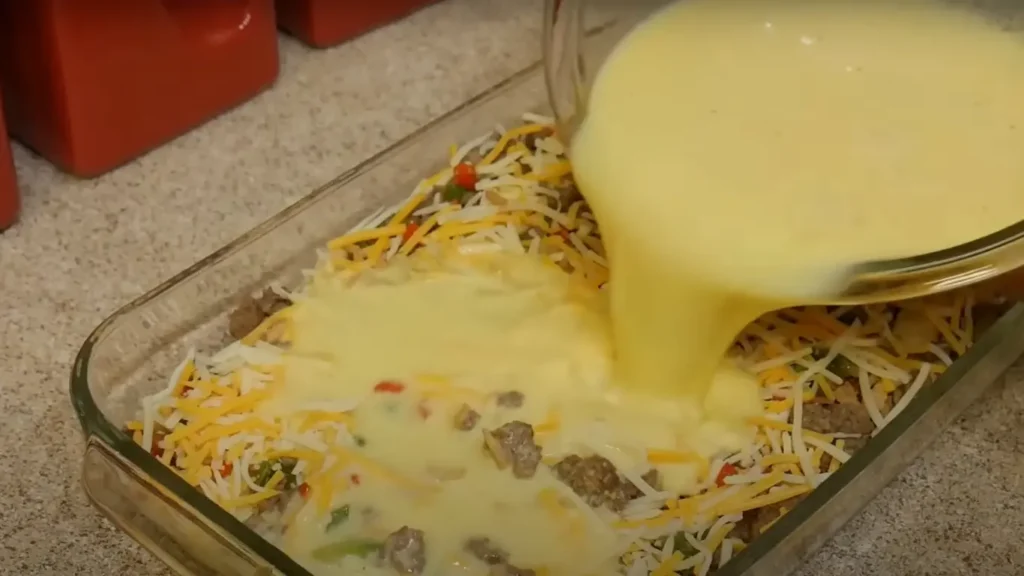
Now that the casserole layers are all in place, it’s time to add the egg mixture—the part that ties everything together. This is where the magic starts to happen. ✨
I grab the bowl of whisked eggs and milk that I prepared earlier and slowly pour it over the casserole, making sure it’s covering everything. I like to pour it evenly across the surface instead of just dumping it in one spot. This helps the mixture seep down into every layer, so no part of the dish is dry or uneven.
You might see the egg mixture take a few seconds to work its way down through the hash browns and sausage—that’s totally normal. Just take your time with it. The goal is to let the eggs soak into all those delicious ingredients without making a mess.
- 🥄 Pro Tip: Don’t rush this step. If you pour too fast, the eggs might splash or pool unevenly. A slow, steady pour helps everything absorb properly and keeps your layers from shifting too much.
Once the eggs are in, I take a fork and gently press down on the top of the casserole—just enough to help the mixture settle into every layer. I don’t mash it down hard, just a light press to make sure all the corners are coated and nothing is floating too high above the surface.
- 🔧 Why This Matters: Pressing the layers down helps the casserole bake more evenly. It makes sure the egg mixture reaches the bottom and that each bite has a little bit of everything—potatoes, sausage, peppers, onions, and cheese.
- 💡 Extra Tip for Even Soaking: If the casserole seems really full, give it 5–10 minutes to rest before covering or baking. This gives the eggs time to soak in slowly, especially if you’re using thick hash browns or extra veggies.
At this point, the dish is fully assembled and already looking beautiful. Everything is tucked in, the eggs are poured, and all that’s left to do now is let it rest before baking.
Step 7: Letting It Rest Overnight
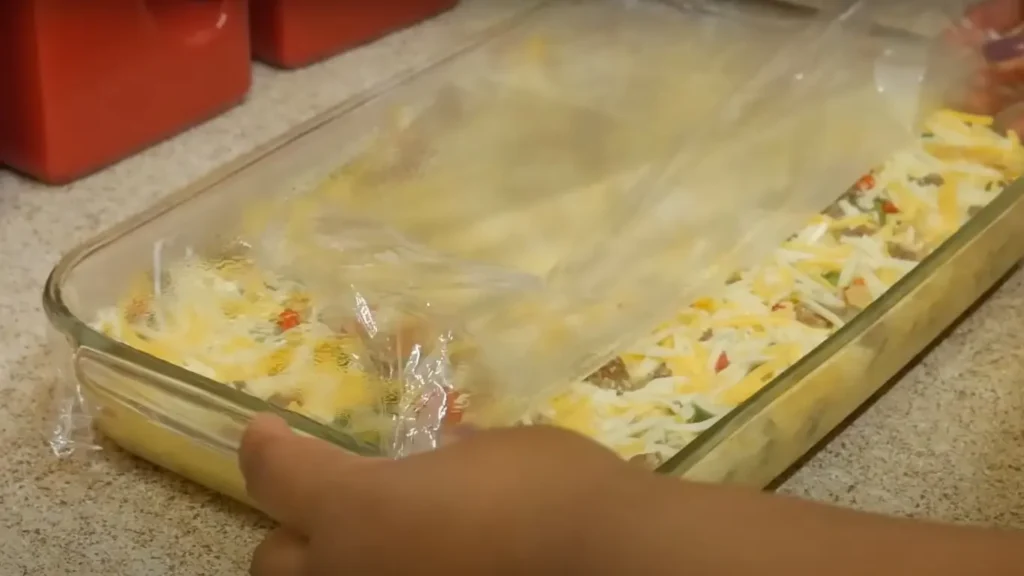
This step right here is one of my favorite little secrets for making this breakfast casserole extra special. Once the casserole is fully assembled and the egg mixture has been poured in, I cover the dish tightly with plastic wrap and place it in the refrigerator overnight.
I know it can be tempting to just bake it right away (especially when it already looks and smells so good), but trust me—letting it rest overnight makes a big difference.
Here’s what happens while it rests:
- 🕰️ The eggs have time to fully soak into the hash browns and meat.
- 🧂 All the seasonings blend together and deepen in flavor.
- 🧀 The cheese softens and starts to mix slightly into the other layers.
By the time morning rolls around, everything has melded together like one big happy family—you can literally feel the difference when you slice into it. It’s more flavorful, more tender, and just so much more satisfying. 💕
- 📝 Pro Tip: When covering with plastic wrap, make sure it’s sealed well, especially around the edges. You don’t want the top to dry out overnight.
- ⏰ In a hurry? If you’re running short on time or just want to make this on the same day, you can bake it right away. Letting it sit for even 15–30 minutes will help a little. But honestly, if you can plan ahead and refrigerate it overnight, do it. You’ll taste the difference.
- ❄️ Make-Ahead Bonus: You can even make this casserole a full day ahead, then just bake it fresh in the morning. It’s a great time-saver if you have guests staying over or you’re hosting a holiday brunch.
You can Also Read The Ultimate Chocolate Chip Cookie Recipe – Soft & Chewy 🍪
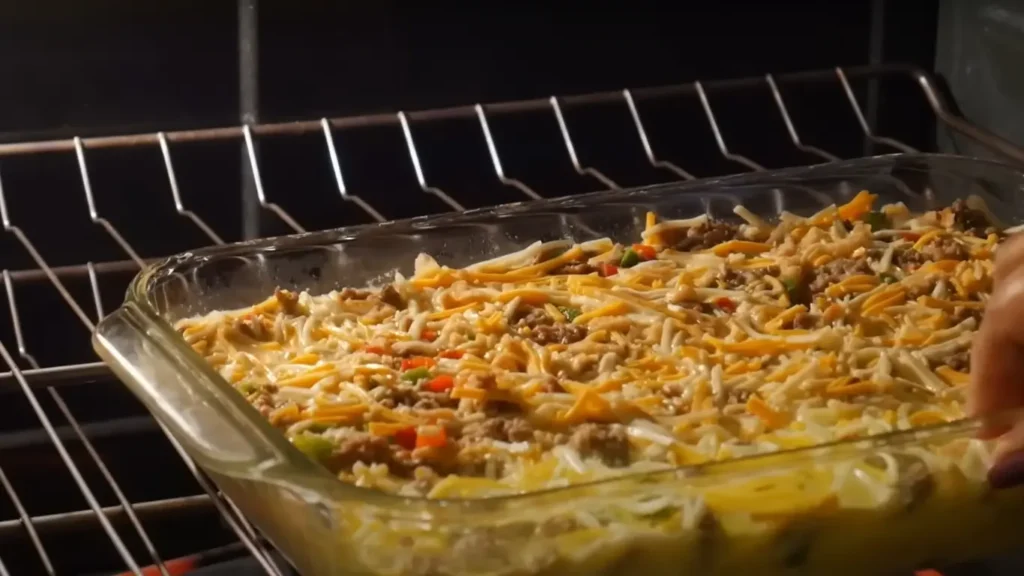
Step 8: Baking It the Next Morning
After a rest in the fridge, your breakfast casserole is ready to be baked! But before you do anything else, the first step in the morning is to take the dish out of the fridge and let it sit at room temperature for 20 to 30 minutes.
This small step makes a big difference. When you let the casserole warm up a bit before baking, it helps everything cook evenly in the oven. If you bake it straight from the cold fridge, the edges might cook faster than the center, and we don’t want that.
Here’s how I bake mine:
- 🔥 Preheat your oven to 350°F (175°C)
- 🧊 Remove the plastic wrap that’s covering the dish
- 🥘 Place the casserole in the oven and bake it uncovered for 40 minutes
After 40 minutes, I do a quick check using a regular butter knife. I insert it into the center of the casserole and pull it out to see if it’s clean.
- If the knife comes out clean and there’s no liquid bubbling up, it’s done and ready to cool.
- If the knife shows a little eggy liquid or the center still looks wet, I cover the top loosely with foil and bake it for another 10 to 15 minutes.
- 🧀 Why foil? The foil helps protect the top layer (especially the cheese) from getting too brown or overcooked while giving the inside time to fully set.
- 👩🍳 Pro Tip: Oven temperatures can vary, so always trust what you see. If the edges look puffy and golden but the center jiggles too much, that’s a sign it needs a little more time.
Once it’s fully baked, the casserole will be golden, cheesy, and puffed up like a dream. And don’t worry—it will settle down a bit as it cools. That’s totally normal and actually makes it easier to slice.
Step 9: Cooling and Serving

After baking, your breakfast casserole is finally done—and wow, it looks so good when it comes out of the oven. The top is golden, the cheese is bubbling, and the whole thing is puffed up like a fluffy, savory cake. 😍
But don’t rush to slice it just yet.
Right after baking, it’s still very hot and soft on the inside. If you cut it too soon, it might fall apart and not hold its shape. So I let it sit for about 5 to 10 minutes before serving. That short resting time gives it a chance to cool slightly and firm up, making it much easier to slice cleanly into perfect squares.
- 🕰️ Why resting matters: Letting the casserole rest helps it set. The eggs finish cooking, the layers come together, and the texture becomes firmer. It’s kind of like lasagna—it’s always easier to cut once it’s had a few minutes to cool down.
- 🔪 Slicing Tip: Use a sharp knife or a flat spatula to cut and lift out each portion. If you greased your dish well earlier (which I always do), the slices should come out easily with nice clean edges.
- 🥗 Serving Ideas: You can enjoy this casserole all on its own, but I love to pair it with:
- A side of fresh fruit (like berries or melon) 🍓
- A little sour cream or avocado on top 🥑
- Some toast or biscuits on the side 🥖
- And of course, a hot cup of coffee or tea ☕
How to Serve Breakfast Casserole 🍽️
This dish is a whole meal by itself, but here are a few things I love serving it with:
- A side of fresh fruit for balance 🍓🍍
- A hot cup of coffee or tea ☕
- Sour cream or avocado slices for a creamy finish
- A light salad if you’re having this for brunch

Make It Your Own 🧑🍳
One of the best things about this casserole is how easy it is to customize. Here are a few fun variations:
- Meat lovers: Add bacon, ham, or both!
- Veggie version: Skip the meat and add mushrooms, spinach, or zucchini
- Southwest style: Use pepper jack cheese, green chiles, and taco seasoning
- Extra protein: Add more eggs or even tofu crumbles for a twist
Storage and Reheating 🔁
Leftovers? No problem!
- Fridge: Store in an airtight container for up to 4 days.
- Freezer: Wrap individual slices and freeze for up to 2 months.
To reheat, microwave slices or warm them in the oven at 300°F until hot.

Breakfast Casserole Recipes
Equipment
- 1 9×13-inch Casserole Dish for layering and baking
- 1 Nonstick Skillet for browning sausage without extra oil
- 1 Mixing Bowls for whisking eggs and mixing ingredients
- 1 Whisk helps make the egg mixture smooth
- 1 Spatula or Wooden Spoon for stirring sausage and veggies
- 1 Measuring Spoons & Cups for seasoning and milk
- 1 Cooking Spray or Brush to grease the baking dish
- 1 Plastic Wrap or Reusable Lid for covering overnight
- 1 Foil to prevent over-browning during baking
- 1 Sharp Knife or Spatula for slicing and serving clean portions
Ingredients
- 1 lb sage pork sausage - or any ground breakfast sausage
- 1 cup diced green bell pepper
- 1 cup diced red bell pepper
- 6 large eggs
- 1/2 tsp salt
- 1/2 tsp black pepper
- 1/2 tsp garlic powder
- 1 cup whole milk - or evaporated milk
- 1 bag frozen country-style hash browns - about 20 oz
- 1 cup crispy fried onions
- 1½ to 2 cups shredded cheddar cheese - mild or sharp, or a mix
- Cooking spray - for greasing the baking dish
- Optional: hot sauce - additional toppings like chopped spinach, mushrooms, cooked bacon, or other cheeses
Instructions
- Brown the sausage: In a nonstick skillet over medium heat, cook the sausage until browned and crumbly. No oil needed. Do not drain the fat—it will help cook the veggies.
- Add the peppers: Stir in the green and red bell peppers. Cook for 3–5 minutes until slightly softened.
- Make the egg mixture: In a bowl, whisk the eggs with salt, black pepper, garlic powder, and milk until smooth. Add hot sauce if desired.
- Grease the dish: Spray a 9×13-inch casserole dish with cooking spray to prevent sticking.
- Grease the dish: Spray a 9×13-inch casserole dish with cooking spray to prevent sticking.
Layer the ingredients:
- First layer: Half the hash browns
- Second: Half the sausage and peppers
- Third: Half the fried onions
- Fourth: Some shredded cheese
- Repeat the layers with remaining ingredients
- Pour the eggs: Slowly pour the egg mixture evenly over the casserole. Use a fork to gently press everything down to help the eggs soak in.
- Refrigerate overnight: Cover the dish with plastic wrap and refrigerate overnight to let flavors blend.
Bake in the morning:
- Let the casserole sit at room temp for 20–30 minutes
- Preheat oven to 350°F (175°C)
- Remove plastic wrap and bake uncovered for 40 minutes
- Check with a knife; if it’s still liquid in the center, cover loosely with foil and bake 10–15 more minutes
- Cool and serve: Let rest for 5–10 minutes before slicing and serving.
Notes
- You can substitute the sausage with turkey sausage, vegetarian sausage, or even mushrooms for a meatless version.
- Feel free to use different cheeses like Monterey Jack, gouda, mozzarella, or a spicy pepper jack.
- The casserole can be frozen after baking. Cool completely, slice, and freeze in airtight containers for up to 2 months.
- Reheat in the microwave (1–2 minutes) or in the oven at 325°F until warmed through.
- Add-ins like spinach, cooked bacon, jalapeños, or caramelized onions take this recipe to the next level!